|
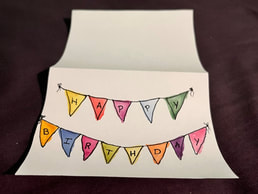
This week is a special week for my family as we have a ton of birthdays all in a row, and what better way to celebrate a birthday on a budget! I went to YouTube to try and find some fun and creative birthday card ideas and I was not disappointed with what I found. Unfortunately, I was WAY too into the artsy fartsy crafts to take progress photos! I screwed up!! SORRY! The Happy Ever Crafter had a super cute and fun card tutorial that left me in awe with what I could do myself. We began by cutting out a square and folding it in half to create the card. For stability, I taped down my card so it wouldn't move on me, but she did not. She then used some techniques I have already learned, such as using masking tape to create a boarder or open space within the painting. In this case we placed a line of masking tape horizontally across the card. We then began free handing candles, which was a little scary for me at first, as I did not want to make mistakes, but I trusted the process! To keep it simple she just painted right over the tape which I found caught a lot of the paint and made a dark line around the tape, but I just emptied my brush of paint, dried it and went over the dark line to soften it a bit. During the video she mentioned that if you get a smudge of paint on the paper where you don't want it, to grab a wet piece of paper towel and wipe it off while the paint is still wet! this tip became a life saver for me towards the end because the paint on the tape got a little messy... oops. We started overlapping candles and she mentioned that we should wait until the first candle is COMPLETELY dry, well... I was a little impatient and my two colours blended together a little bit! At first I was a little upset and discouraged and honestly just wanted to restart, but as it dried it honestly wasn't that noticeable. So I suppose the real lesson was to TRUST THE PROCESS, haha. The Happy Ever Crafter then went on to detail the candles further by drawing different patterns on them, but I wanted to stop where I was at, I was more than happy with how this card turned out and I'm quite proud of myself! Finally I finished my card by handwriting "Happy Birthday" where the masking tape was previously 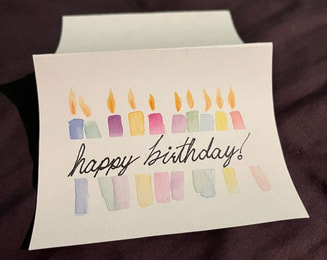 Next up I decided to take a break from YouTube, and took a look at Pinterest. On pinterest I found a cute banner card that I just HAD to make, pictured below. 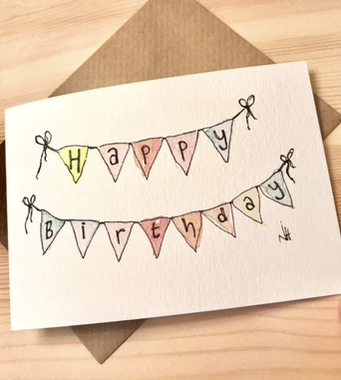 https://pin.it/56ggUej
For the next attempt, I made the banners a little smaller AND I planned out in pencil where each banner would go. I learned from my mistakes people!! I began by drawing a messy line about 1/3 of the way down from the top, and another longer messy line about 2/3 the way down from the top. I then made squiggly triangles (redrawing them if needed, so they were to my liking) and made sure to spread them evenly-ish across the banner string. Then I began painting. I also like this card a little more because I even made sure to make the colours less dark and concentrated, and in my opinion it just seems a little more inviting to open. But maybe that's just me. To finish I outlined the banners and drew little strings with bows and wrote each letter of "Happy Birthday" in the flags. 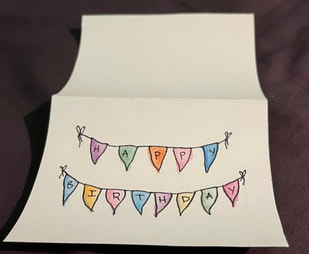 My final card for this week was sort of a disaster, my nephew woke up from his nap, so I rushed through it and I guess I didn't learn my lesson because I ended up free-handing it again. *insert face-palm* Now this card was also found on Pinterest, but mostly used it as inspiration, and did my own little twist! 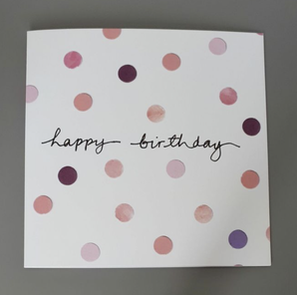 https://pin.it/51Bfvxs I really loved the simplicity of the circles and the writing. So I decided that I would create a card with 13 circles one for each letter of "Happy Birthday," I feel like if I had more time and less distraction, it would have turned out a little different haha. But either way it was a card, and its the effort that counts! 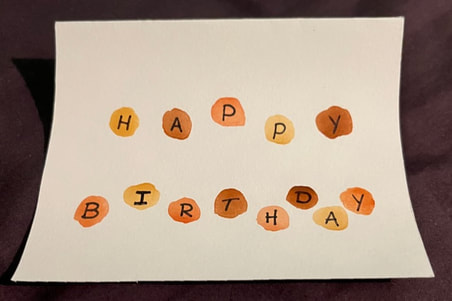 Although the circles didn't turn out exactly how I wanted and the letters are a little quirky, lets say, I absolutely loved how my colours turned out that, not to toot my own horn, I mixed myself and they actually look great together! So seeing the light in the dark, I am very proud of what I have achieved this week. I enjoyed the process, and most of the outcomes and all of these will be put to good use!
0 Comments
Leave a Reply. |
Halle ReimerThis blog page is where I will document and reflect on my personal learning project. Here I will tell you my initial knowledge of watercolour paint and, in time, what I have learned over the course of the next few weeks I spend working on my watercolour paint skills. |
 RSS Feed
